My blog has moved!

You should be automatically redirected in 6 seconds. If not, visit
http://www.motherhoodsupport.com
and update your bookmarks.

Showing posts with label Money Saving Monday. Show all posts

Monday, October 4, 2010

Money Saving Monday: Recycle & Save Your Money

You know we are all about recycling and we love finding cute crafty things to make, so when mama Jenny sent us this email of something she came up with we HAD to SHARE! Not only is it super cute and good for the environment, but it saves on your pocketbook!

Here is what she wrote:
"Have any containers from baby snacks? Chips?  Any container really..... Instead of throwing away, recycle them into office organizers. You can take different sized ones and glue them together to make neat arrangements of them.  I have the Gerber veggie crunch containers and decided to make pen/pencil holders.  Or maybe I'll use one in the bathroom to hold cotton balls, brushes, whatever!!!  I have lots of stamps and scrapbooking stuff, so I stamped mine, but you can do anything, just use your imagination!  You could get contact paper to have it match a room."


Here is her finished project. Way to go Jenny!!!


I LOVE this idea! The possibilities are truly endless. I can't wait to try this! You could even let your kids decorate some of them to store their crayons, stickers etc. Don't forget to talk about why it is so important to recycle :)

** Don't forget to check out our Coupon Queen for other money saving ideas!**

Monday, September 27, 2010

Money Saving Monday: Swag Bucks

Just started learning about this online thing called Swag Bucks. It is an "online portal dedicated to helping you earn digital dollars called "Swag Bucks", which can be redeemed for exclusive Swagbucks.com merchandise". You can earn the swag bucks doing many different things. 

  1. You search the web by using their browser. You can even add it as your home page so you always remember to use it
  2. They have "special offers" you can sign up for and you get swag bucks in return
  3. You take surveys in exchange for swag bucks
  4. You can trade in your phone for swag bucks! Save the planet and get rewarded! Don't throw those phones in a landfill :)
  5. You can shop products through them
  6. Take a poll and receive swag bucks
It really is pretty easy and just for signing up at Swag Bucks you will start out with 30 points! You can also get points for referrals so tell all your friends! What can you redeem with your bucks? It seems like it is just about anything. My fav- giftcards... amazon, target etc. You do need a lot of points for these, but I figure why not use their search bar to earn some free stuff, even if it takes me awhile?!  I am just starting this so we will see how it works. Let me know if you are already a believer and ways you earn your bucks. If not, sign up now and keep me posted!
Happy Savings :)

Search & Win

Tuesday, September 21, 2010

Make Your Own Soft Scrub

I talked about in a recent post that as my cleaners run out I am going to start making my own. I have been buying "natural" cleaners for years now. I have tried shaklee, method, seventh generation and melaleuca products. All of them work wonderfully and I have been worried that what I make myself just won't do the job that the store bought products do. However, the more I read, the more I am realizing that the DIY recipes are working for people. Not only are they really cleaning, but they are MUCH cheaper than store bought alternatives and not bad on the environment.

You can google DIY cleaning products and get a slew of recipes. I was unsure of which ones worked the best so I started with one of my fav sites Healthy Child Healthy World. I was running out of "soft scrub" and found a recipe on their fb page (check out their video link -how to make your own eco friendly soft scrub).

Here is the recipe:

  • 1/2 cup baking soda
  • 1/8 cup liquid castile soap (if you want a thicker consistency, add less or vice versa)
  • 1 tsp vegetable glycerin
  • 10 drops of essential oil (this is not necessary but if you want it to smell good then choose your scent!)


She recommends Dr. Bronners liquid castile soap which I found at Whole Foods. They have many scents or plain so you can choose what you like. I already had lavender essential oil so I mixed it in and it smells so yummy! You can use a repurposed squeeze bottle or buy one. Mix all together (I used the handle of my mixer) and clean away!


This took me all of about 5 minutes to make. Super easy, and best of all it WORKS! I would love to hear your fav DIY cleaning recipes so I can try them out as well!

Why worry about what cleaning products you are using? Most of the every day cleaning products people use around their home are releasing fumes into the air that can exacerbate allergies, sinuses and asthma. Some families have found that when they have switched to all natural cleaners, their child's asthma has completely ceased! Crazy right?! Not only do they help with clean air in your home, but allows for a lower risk of your kids getting into deadly products. Most of the items used in DIY are not products that are particularly harmful. Even if you keep them locked away, your little ones are touching, crawling etc. everything in your house which has ultimately been cleaned with a not-so-good-for-you cleaning product. Lastly, (here is my tree hugger coming out!) people forget that what products they are using to clean with end up down the drain and into our water system! Yuck!

I totally get that not everyone has the desire to change over cleaning products. You have used your pledge for years now and why switch now? I believe you should do what works best for you and your family. However, I didn't even think about how my use of chemicals effected myself (at the time I learned of all of this I didn't have Cody) or the earth. My house would smell like a chemical factory when I finished cleaning. It wasn't until I started reading and seeing what my footprint was leaving behind did I want to change it. Hopefully after reading this post you can see how easy it really is to DIY and remember that if you want to change your products over take your time! It is too overwhelming to try and do it all so as you run out of something, try to DIY and see what happens! You might be pleasantly surprised :)

Monday, September 20, 2010

Free Arts & Crafts!

Regardless of where you are from or what your family budget is, there is probably a Michaels near you. Before I had Cody, I thought Michaels was just arts and crafts for adults, but it is so much more than that! Not only do they have AWESOME dollar bins, but they also have a ton of craft projects for the kiddos. I recently signed up for emails with them called The Knack. They email you great free and/or inexpensive projects they have in store for the kids. Want to get into the fall season?? Check out some of the suggestions they have:

You all know how cheap money conscious I am, so when I found out Michaels does this, I was pumped! Not only is most of it free, but it saves me from having to come up with my own craft projects for Cody bear! I thought Cody was too young for art projects, but long story short, we ended up taking an art class and he LOVES it. I was actually in tears when I was hanging up his art on the fridge :)
So start your kids early and instill the love of art in your household! 


Don't forget to check out our family fun page for other activities. 

Monday, August 30, 2010

Money Saving Monday: Kids Clothes on the Cheap!

Now that our boys are nearing two, we have come to realize how expensive it is to buy their clothes that a month later they have grown out of! We are always trying to find ways to help our family budget and getting clothes for the boys is no exception! We thought we would share what we have found so far and would LOVE for you to share your tips with us as well!

  1. Consignment Shops: These are places you can get gently used clothing & shoes for reasonable prices. Average cost of shirts may be around $4. You can also take your clothes in to sell! Some stores we have visited include: Once Upon A Child, Snooty Fox, Reruns for Wee Ones (local to cincy). 
  2. Swap Sites: These are online sites that allow you to swap clothes with other families. Most are free but require a nominal fee for shipping the items. One we just recently found but haven't tried yet is Thred Up. You can also check out our Coupon Queen for a list of several other swap sites!
  3. Garage Sales: This can be a hit or miss... but that can be part of the fun! You can normally find clothes for $1 or less and there is always room for bartering the price! Craigslist has links to sales in your area.
  4. Online: Parents will sell gently used clothing at a fraction of the cost! Check out Craigslist and Ebay!
  5. Local Parent Sales: We have Mothers of Twins Sales etc. that go on local to cincy. They sell kids clothes on the cheap... normally $1 a piece!  Check out your area for local parent group sales or start your own! We will be posting upcoming sale dates as we find them on our facebook page (and feel free to post anything you find on there too)! 
  6. Don't forget to ask your friends and family to borrow their used kids clothes... Then it is free :)
Please add anything you know of to our list!!! We are always looking for a great deal!


Monday, August 23, 2010

Money Saving Monday: My Coffee Filter Can Do What?!

I am not a coffee drinker but the hubs is and it was nice to see that I can use the filters for other things and save a little money in the meantime (thanks to Jen for sharing)!! 


  • Clean windows and mirrors. Coffee filters are lint-free so they don't leave behind any residue.

  • Save a bottle of wine. Broke the cork? No problem. Just place a filter over a pitcher and carefully pour the wine into it.

  • Line flower pots. Place a filter at the bottom of the pot to prevent soil from leaking out of the drainage hole.

  • Protect china and non-stick cookware. Place a coffee filter between dishes or pans when storing or packing. 

  • Wipe off smudges.  In a pinch, you can use to clean eyeglasses, camera lenses, televisions, and computer monitors.

  • Keep your microwave clean. Prevent splatters by covering dishes or bowls in the microwave with coffee filters. Using another plate is your best bet, but filters are a good alternative to plastic wrap. And you can easily reuse them a few times.

  • Make a bouquet garni. Tie up bay leaves, parsley, or other herbs in a coffee filter. Drop it in your stew or soup pot, and easily remove it when you're done cooking. Recipes often suggest cheesecloth for this process, but a coffee filter is an easy-to-find alternative.

  • Diffuse the flash on your camera. Place a coffee filter over your flash to soften the brightness. You can also try putting coffee filters over lights or lamps to lessen the harshness of direct light when taking indoor photos.

  • Make sachets. Tie lavender or other dried flowers and herbs in a coffee filter to make great-smelling bundles you can store in drawers and closets.

  • Use for sewing projects. Coffee filters make a great backing for embroidering or appliqueing soft fabrics.

  • Make tea bags. Wrap loose tea in a filter and tie with a string.

  • Use for storage. Wrap Christmas ornaments and other rarely used fragile items before packing away.


  • We would love for you to share with us ways you save money! Find a deal that you just have to share NOW??? Leave a comment on our facebook page for all of us to see!!! Check out our Coupon Queen page for tons of links that will help you SAVE YOUR MONEY :)

    Tuesday, August 17, 2010

    Make Your Own Baby Food!

    The Cincinnati Family Enrichment Center had asked me to do a workshop on how to make your own baby food. I am certainly not a chef, but Sharon just wanted a mom point of view! She wanted me to share my own experience and tips and tricks I picked up along the way. Since I am so passionate about child nutrition, I was excited to be able to volunteer my time and hopefully help some other mamas!

    I decided to attach my "cliff notes" below so I could share them with you (and have something to reference for when I have the next one!). Let me know if you have any questions!


    ·     ALWAYS consult with your Pediatrician before you start a DIY baby food program.
    o    The 4 day wait rule: once you introduce a new food you should wait 4 days before introducing a new food

    ·     Resources:

    ·     Equipment:
    o    Steamer, microwave, oven or a boiling pot of water depending on the food
    o    Ice Cube Trays (you can save on foil if you buy the trays with lids)
    o    Food Containers 
    o    Blender/ Food Processor/ Magic Bullet
    o    Ziploc bags

    ·     Baby Food Hygiene
    o    Always wash your hands, your utensils, & your produce before doing any cooking!!!


    DIY Baby Food (steps based off of Super Baby Food)

    1.  Pick foods based off of your babies age (pgs. 86 & 87, see handout)
    2.  Prepare (wash & then steam/ boil/ microwave) produce appropriate for you baby (pgs. 424-463)
    3.  Puree produce
    a.   The food consistency you are trying to achieve will be dependent upon you child and their age
    b.  The more water you add, the thinner the consistency. You will add less water if you want the puree to be thicker
    c.   You can create a smooth puree consistency the longer you blend the food. Once your child gets a little older, you can blend a little less to create a more chunky consistency.
    d.  Pour your puree into your ice cube trays, freeze overnight, & then put your cubes into freezer safe Ziploc bags! Label your bags with the name of the fruit or veggie and the expiration date.
    e.   Each cube is considered one serving

    DIY Baby Cereal  (p 207)
    (I have found that the magic bullet is AWESOME for grinding grains!!)

    1.  Brown Rice: 
    a.   Measure a cup of water on the stove to boil
    b.  While the water is heating up, grind ¼ cup of brown rice until it is a powder
    c.   Once your pot is boiling, turn the heat down to the lowest setting
    d.  Sprinkle the powder into the pot while stirring briskly with your whisk
    e.   Cover the pot and cook on low for 10 minutes
    f.    This will make a little more than 1 cup. This will keep in the fridge for 2-3 days

    2.  You can also do this with millet (3tbs), barley (1/4 cup), oatmeal (1/4 cup). Cook as directed above!

    DIY Yogurt : click the link for step by step instructions

    Tips & Tricks

    1.  Take the food cubes you will need for the next day out the night before and they will be thawed by the time you are ready to use them!
    2.  Need food now? Take your fresh fruit, peel, core and mash!
    3.  Add tofu to anything to add some protein to the meal! You can freeze tofu in ice cube trays. Once you puree it, you pour it into the trays filling them half way, cover with water and freeze!
    4.  Depending on age, see handout for Super Snacks.
    5.  You can mix ANYTHING into yogurt:
    a.   Veggie or fruit cubes
    b.  Tofu cubes or fresh tofu
    c.   Healthy Extras- use dependent on age appropriateness (see below)
    d.  Hummus… you get the picture! ANYTHING!!!
    6.  Healthy Extras: (these can be mixed into anything! For a complete list see p. 288)
    a.   Brewer’s Yeast
    b.  Wheat Germ
    c.   Tofu
    d.  Ground Nuts
    e.   Nut Butters
    f.    Ground Seeds
    g.  Tahini & other Seed Butters
    h.  Instant Non Fat Dry Milk
    i.    Blackstrap Molasses

    Toddler Ideas  
     ·     Although your child is on solids now, you can keep pureeing your fruits and veggies (now you have something to do with the produce that is about to go bad… puree and freeze). Mix them into yogurt, cottage cheese, or use as a spread on bread or crackers.
    ·     Continue mixing in your Healthy Extras!
    ·     If you have a picky toddler, try putting cheese, their favorite nut butter, or healthy salad dressing onto their vegetables.
    ·     Batch and Freeze: Pick out a few meals every month, make a large batch & freeze using the phantom freezer method (see batch and freeze for more info). You have healthy meals for the month!

    Why Make Your Own?? (natural mother website)
    1.  It's less expensive. A pound of fresh organic carrots will run you about $1. A four-ounce jar of organic baby food carrots cost about $.75--or $3 a pound!
    2. It tastes better. Homemade baby food actually tastes like food, and your baby will grow accustomed to the flavor of fresh fruits and vegetables, possibly making her more likely to accept those foods later.
    3. You know what's in it. You know for sure that it's free of additives and preservatives.
    4. You can tailor the texture to your baby's preference and developmental stage.

    **You can also check out our Recipes Blog for easy baby food purees and other nutritious meals for the little ones!**

    Monday, August 16, 2010

    Money Saving Monday: Giveaways Galore!

    I have been talking a lot about how I am bound and determined to SAVE &/or MAKE money in recent posts. Well another way you can try product for FREE is through giveaways. We have a special place on our Coupon Queen page where we list blogs that do giveaways. This way you can click on the links and see what they are giving away that week! If you sign up for enough of them you are bound to win something right?!


    Interested??? Well, we found something for you that will be even EASIER! There is a website called Giveaway Scout which brings you the latest giveaway promotions with products ranging from coupons and samples to high value jewelry and electronics. Giveaway Scout scans a large number of blogs and updates every hour with the latest offers. Since giveaway contests usually expire quite quickly, they offer an automated update service that informs you by email when a new giveaway in your chosen category is discovered! It couldn't get any easier than that! We will also be adding their link to Coupon Queen


    We are always trying to find cool things to offer to you as a giveaway on our blog. We would love to hear from you about products you would like to see featured on our site so you can have the opportunity to try it for free!! If you are a business or individual interested in doing a giveaway on our blog contact us at jennieandkim@gmail.com


    Happy Shopping! Good Luck!!! 

    Monday, August 9, 2010

    Money Saving Monday: Back to School Deals!

    No, our boys aren't anywhere near school age but we'd like to pass on some useful info for all you Mamas out there who do have kids getting ready to go back to school (can you believe it is that time already?!)! Here are some great deals we've found that we'd like to pass along and we hope if you come across any other good deals you'll share them with us too!


    Here is some additional info from WCPO.com:

    • First stop: Office Depot: I found a big selection, and big deals like 150 sheets of filler paper for just $1.
    • I then hit Target, where I found convenient layout and nice prices. Among them: 24 Crayola crayons for $.25, Mead one subject notebooks for $.50, and 1.5 inch binders for $2.50.
    • Next stop , Meijer, which is featuring 34 different items for just $.99 each, from glue to pencils, scissors to folders.
    • Then it was on to Walmart, which had some super lower prices. Among them: Mead 5 star notebooks -- the Cadillac of notebooks -- for $2, Elmers glue for $.25, and Very binders for $1.87. All, good brand name.
    • My final stop was Staples, a school teacher's dream, with every supply you could think of. They featured some big markdowns on their in-house brands, like spiral notebooks for $.15. Name brand prices were somewhat higher that Walmart, Target, and Meijer.
    So where to shop depends on what you are looking for...
    Staples wins for biggest selection.
    Office Depot was next best.
    Walmart wins for lowest prices, though selections were a bit more limited.
    Meijer was our best overall value, though like Walmart, not the biggest selection.
    Target wins for the most pleasingly laid out back-to-school section, with some great deals.

    If you are more of an online shopper, you should check out Ebates for your back to school shopping. They are offering double cash back on purchases right now!

    Where have you found the best deals for Back to School?!!

    Saturday, August 7, 2010

    Freebie Update

    I had talked about how I was going to start signing up for freebies in a recent post and I am here to send an update! It hasn't been too hard or time consuming. I thought I would check things daily, but I haven't had time for that so I have been checking my "freebie" sites weekly and it has been working well for me.

    Things I have liked so far:

    • It was wise to start a separate email account because you do get some junk mail from the things you fill out. 
    • You get to try &/or donate products you wouldn't normally buy.
    • There are a ton of freebies for food where you sign up for restaurants and they give you a free meal! This has been great for the hubs because he eats out every day for lunch (trust me... I have TRIED too many times to get him to pack a lunch...it isn't gonna happen)!
    • It saves money!! I have gotten so many "feminine hygiene" products that I may not ever have to buy my own again!
    Things I haven't liked so far:
    • The only thing I can say is that from a green standpoint, there is some waste doing this. All the samples are sent in packaging, most of which can be recycled, but I have felt a little guilty throwing away the outside plastic that the sample comes in for some of them. Other than that, it has been all good!
    If you want to try this for yourself I would recommend going to our Coupon Queen page and scroll down to "FREE STUFF". Then just follow the links to the sites listed to get your freebies! You will find that many of the sites list the same things so even if you are checking weekly, it should 't be too overwhelming! And don't forget.... sign up for a separate email account to bypass junk mail being sent to your everyday email! 

    Check out some of my freebies below:


    Some of the freebies include: feminine hygiene products, diapers, coupons, makeup vouchers, toiletry sample packs, water testing kit, free circus tickets, & free meals at local restaurants! This has only been a fraction of what I have been sent! Pretty cool right!?

    We would love to hear how you get freebies and what your favorite sites are to get them! We would love to add them to our Coupon Queen page!!!!

    Thursday, August 5, 2010

    Family Fun: Make Your Own Jam!

    Our latest adventure this past week has been making jam, syrup and blackberry cobbler! Last Saturday we took a trip to Rouster's Apple House in Milford. They have pick your own blueberries and blackberries as well as peaches and apples! (They don't have this every day, so be sure to check out their website for their opening hours.) It was so much fun picking berries at the farm, and it's a great way to get the kids involved and use up some of their energy out in the great outdoors!


    We wanted to get the berries so we could try making our own jam. We ended up with 10 jars of blueberry jam and 10 jars of blackberry jam. Since we are trying to be sugar conscience with our food for the boys, we used Sure Jell in the pink box that uses 25% less sugar.  With a regular box of Sure Jell you would normally have to use about 7 cups of sugar but we were able to cut back the sugar to only 4 cups. We hope by this time next year we will be able to use our stevia plant for an all natural sweetener, which is much healthier for you than the white refined sugar! We used a great website called Pick Your Own where you can find great information about canning ANYTHING! It gives you tips and tricks on the best ways to pick your own fruit, the easiest ways to can, and everything has step-by-step instructions with pictures! We have used this website for everything we've canned so far. 


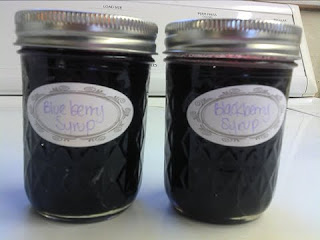
    Since we had SO much fruit, we were also able to make blueberry & blackberry syrup which is made similar to jam except you don't use the pectin (Sure Jell).  Please see here for more details. 


    We also froze half of what we picked so we could have fresh berries through the winter. You could use them plain, in pancakes, muffins, smoothies etc.! The easiest way to we found to freeze the berries was to layer them in casserole dishes with foil in between, freeze overnight and then transfer them to freezer safe containers.


    We had a few extra blackberries left over so we decided to make blackberry cobbler! Paired it with some ice cream and it was AWESOME!


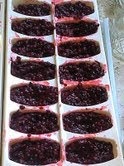
    After we made the syrup, we had left over blueberry and blackberry "pulp" that we put in ice cube trays so we can use them later in yogurt, as a spread on toast, drink flavoring, etc. We try the no waste approach! We have come to realize you can freeze just about anything in ice cube trays!!!


    If you like the idea of having fresh, healthy food on hand you might want to try canning for your family! We were pretty intimidated at first but the more we've been doing, the easier it gets! There are plenty of great resources out there to help you and we would love to share tips! Here's a few canning items that we use and love that could get you started!


    Monday, July 26, 2010

    Money Saving Monday: DIY Yogurt!

    On my quest for saving money, I was told DIY baby food costs the fraction of the price compared to commercial baby food. Another mama recommended Super Baby Food, which takes you step by step on how to make your own baby food. I bought the book and ended up LOVING it! It has so much more than DIY baby purees. One thing I found in the book was how to make your own yogurt. I having been doing this since Cody was old enough to eat yogurt (which was when? I can't even remember!). It is not only super easy, but it is inexpensive, you save on plastic, and you know what's in it! Super Baby Food goes into GREAT detail about different ways and methods to make yogurt. I am going to share the way I do it... if you have ever been interested in making yogurt, maybe this will help!

    What you'll need:

    • Milk (I use whole milk for Cody)
    • Starter yogurt (you can use yogurt from a previous batch of homemade yogurt or buy yogurt at the store- my fav is greek yogurt!)
    • Non-fat Dry Milk (optional- you can find it at any grocery store)
    • Yogurt Maker (Euro Cuisine Automatic Yogurt Maker - YM100: this is the one I bought. I like that it has an automatic shut-off)

    Step 1
    Kill all the "bad" bacteria in the milk by scalding it:
    ** I use stove top scalding. You pour the milk (my yogurt maker calls for enough milk to fill all seven of the jars that come with my machine) into your pot, set your stove to med-high and let it sit until you reach 185 degrees (you can use a yogurt or candy thermometer which is only a few dollars) stirring often. If you heat it too quickly or you don't stir enough the milk may scorch the bottom of the pot. (I never have the time to make sure I stir it enough so I just don't touch my whisk to the bottom of the pot.)


    Step 2
    Cool the Milk to Incubation Temp- 112 degrees
    **Once your milk reaches 185, take it off the burner. You can let is sit until it reaches 112 or you can put it in the fridge to speed the process.

    Step 3 (OPTIONAL)
    Add the Nonfat Dry Milk
    **I use a pitcher because it makes for easy pouring. I pour in around 1/4 cup of nonfat dry milk (this adds extra nutrition and thickens the yogurt).

    Step 4 
    Add the Incubated Milk
    **Pour the milk from your pot into your pitcher. If you have added the milk powder, stir briskly with your whisk until all lumps are dissolved.

    Step 5
    Add the Starter
    **Add the yogurt starter. My yogurt maker calls for enough yogurt to fill one of my glass jars. Stir until all is smooth.

    Step 6
    Pour Mixture into Glass Jars
    **Once you pour the mixture into the jars, you set the timer. The longer the timer, the thicker the consistency of the yogurt. I like mine to sit for around 12-14 hours.


    That's it! It may seem like a lot of steps but once you do it a few times, it really becomes super easy and something you can just add into your routine. Super Baby Food does a complete breakdown on money saved, but she basically says that store-bought yogurt costs about 3 times that of homemade!!! N-I-C-E!!

    Here are some yogurt flavoring suggestions (Cody will eat anything if you mix it with yogurt!):

    • fresh pureed fruit or veggies
    • tofu
    • jam or jelly
    • canned fruits, drained/chopped or pureed
    • jarred commercial baby food
    • applesauce
    • blackstrap molasses
    • maple syrup
    • honey (for babies over a year)
    • nutritional enhancers: wheat germ, brewers yeast, flax etc.
    • lemon or lime juice
    • cinnamon
    • nutmeg
    • ground nuts (ask doc when baby is ready for that)
    • peanut butter or other nut butters
    • finely chopped fruits or veggies
    I would love to hear other suggestions on yogurt flavorings! 

    Monday, July 19, 2010

    Money Saving Monday: Cheap & Easy Way to Clean Your Jewelry

    We received this cheap and inexpensive tip from mama, Jenny! She tried and tested this recipe and says it works great! 


    Things You'll Need:
    • Baking pan
    • Aluminum foil
    • Boiled Water
    • Large saucepan
    • Soft cloth
    • 1 tbsp. baking soda
    • 1 tbsp. salt

    Step 1
    Line a baking pan with aluminum foil, placing the foil shiny side up. The size of the baking pan used will depend on the amount of silver jewelry that you need to clean. All of the jewelry will need to be laid out flat on the aluminum foil, so you may need to clean the silver jewelry in intervals if you do not have a pan big enough.
    Step 2
    Place your silver jewelry on the aluminum foil, being sure not to layer it. None of the jewelry should be overlapping or touching. If one jewelry piece is covered by another, it will not be cleaned in the area that is covered.
    Step 3
    Fill a large saucepan with water and bring to a boil. You will need enough boiling water to completely cover all of the silver jewelry in the baking pan. Add 1 tablespoon of salt and 1 tablespoon of baking soda to the boiled water.
    Step 4
    Pour the boiling water into the baking pan, carefully. If you do not need the entire saucepan of boiling water to cover the silver jewelry, don’t use it all. You do not need to fill the pan completely to the top.
    Step 5
    Allow the silver jewelry to soak until the water cools. The heat from the boiling water will help to loosen and dirt or grime that is on the jewelry, so don’t rush the process.
    Step 6
    Remove the silver items from the baking pan when the water is completely cooled. Air dry the pieces and shine them with a soft cloth.  (she ran her necklaces through a papertowel to wipe the dirt off instead, which she recommends)

    We love these homemade remedies! They are the best!!! Don't forget to check our Coupon Queen for additional money saving tips!

    Thursday, July 15, 2010

    Family Fun: Pick Your Own Fruits!

    One of our favorite things to do with the boys is check out the local farmer's markets and pick your own fruit farms. Last year, we took it a step further and canned our own apple sauce and tomato sauce. It was a labor of love, but it lasted us all winter! Canning allows you to know exactly what ingredients are in your food! We officially started this year's canning yesterday with peaches! We also got blueberries and blackberries and used our food saver bags to seal them and put them in the freezer. This way, you can have fresh berries all year long! They are especially good in pancakes, muffins and cakes.


    Here is the step by step way we canned our peaches:

    We found that 1/2 peck of Freestone Peaches made about 9 pint size jars of peaches. You definately want to get the Freestone Peaches because the peach comes away from the core. The Clingstone Peaches "cling" to the core and you'll end up with something that looks more like mush than peach slices as an end result. We got our peaches from Irons Fruit Farm and it was about $16 for 1 peck of peaches.

    Step 1 - Wash the peaches

    Step 2 - Peel the peaches
    We used a great trick: dip the fruit in boiling water for 20 to 45 seconds. Remove from the boiling water and put into a large bowl or pot of cold water and ice for several minutes. The peel will come right off!


    Step 3 - Cut the peaches
    Cut the peaches in half, or quarters, or slices, as you prefer! Remove pits!


    Step 4 - Prevent peaches from darkening
    To keep the fruit from turning brown, when you get a bowlful, sprinkle 1/4 cup lemon juice and then stir the peaches to make sure all the surfaces have been coated. (if you see above, we put ours in a casserole dish and "tossed" the peaches with our hands with the lemon juice)

    Step 5 - Prepare the sugar solution
    Peaches must be packed in a solution of water and sugar or fruit juice. It's up to you which to use, we used sugar. Sugar is also added to improve flavor, help stabilize color, and retain the shape of the fruit. We opted for a light syrup and for every 6 cups of water you would use 2 cups of sugar. We needed 2 batches of the sugar solution for 1 peck of peaches. To prepare syrup, while heating water, add sugar slowly, stirring constantly to dissolve. Bring to a gentle boil and keep it simmering. After preparing the liquid syrup, keep it hot (but not boiling).


    Our goal next year is to use the sugar from our Stevia plant. It is an all natural sugar! You put the leaves in a dehydrator, grind the leaves into a powder and you have your own all natural sugar! 

    Step 6 - Hot packing the peaches
    In this step, we added the peaches into the sugar solution for 5 minutes. We then packed the peaches into sanitized jars (leaving 1/2 to 1 inch space at the top) and covered with boiling sugar syrup leaving 1/2 inch head space.


    Step 7 - Process the cans
    We used a Dial-Gauge Pressure Canner. The processing time was only 10 minutes once it got to the correct pressure. See your canner instruction manual for an exact time.

    For more details about canning we like the Pick Your Own website.

    Here is our finished product!
    This worked out to a mere $1.77 a jar! Can't beat it!
    (Once the jars cool, the lids seal completely and the peaches with sink to the bottom)


    We finished off the day making some yummy homemade pesto! Are you looking for something to do with your basil?? Head on over to our Recipes page and check it out for yourself!

    If you're looking for a pick your own farm in your area click here and get the kids involved! They really enjoy the novelty of picking their own fruits and it helps you out in the process!

    We would love to hear your tips and tricks on canning peaches! Happy Canning!