My blog has moved!

You should be automatically redirected in 6 seconds. If not, visit
http://www.motherhoodsupport.com
and update your bookmarks.

Showing posts with label Healthy Living. Show all posts

Tuesday, September 21, 2010

Make Your Own Soft Scrub

I talked about in a recent post that as my cleaners run out I am going to start making my own. I have been buying "natural" cleaners for years now. I have tried shaklee, method, seventh generation and melaleuca products. All of them work wonderfully and I have been worried that what I make myself just won't do the job that the store bought products do. However, the more I read, the more I am realizing that the DIY recipes are working for people. Not only are they really cleaning, but they are MUCH cheaper than store bought alternatives and not bad on the environment.

You can google DIY cleaning products and get a slew of recipes. I was unsure of which ones worked the best so I started with one of my fav sites Healthy Child Healthy World. I was running out of "soft scrub" and found a recipe on their fb page (check out their video link -how to make your own eco friendly soft scrub).

Here is the recipe:

  • 1/2 cup baking soda
  • 1/8 cup liquid castile soap (if you want a thicker consistency, add less or vice versa)
  • 1 tsp vegetable glycerin
  • 10 drops of essential oil (this is not necessary but if you want it to smell good then choose your scent!)


She recommends Dr. Bronners liquid castile soap which I found at Whole Foods. They have many scents or plain so you can choose what you like. I already had lavender essential oil so I mixed it in and it smells so yummy! You can use a repurposed squeeze bottle or buy one. Mix all together (I used the handle of my mixer) and clean away!


This took me all of about 5 minutes to make. Super easy, and best of all it WORKS! I would love to hear your fav DIY cleaning recipes so I can try them out as well!

Why worry about what cleaning products you are using? Most of the every day cleaning products people use around their home are releasing fumes into the air that can exacerbate allergies, sinuses and asthma. Some families have found that when they have switched to all natural cleaners, their child's asthma has completely ceased! Crazy right?! Not only do they help with clean air in your home, but allows for a lower risk of your kids getting into deadly products. Most of the items used in DIY are not products that are particularly harmful. Even if you keep them locked away, your little ones are touching, crawling etc. everything in your house which has ultimately been cleaned with a not-so-good-for-you cleaning product. Lastly, (here is my tree hugger coming out!) people forget that what products they are using to clean with end up down the drain and into our water system! Yuck!

I totally get that not everyone has the desire to change over cleaning products. You have used your pledge for years now and why switch now? I believe you should do what works best for you and your family. However, I didn't even think about how my use of chemicals effected myself (at the time I learned of all of this I didn't have Cody) or the earth. My house would smell like a chemical factory when I finished cleaning. It wasn't until I started reading and seeing what my footprint was leaving behind did I want to change it. Hopefully after reading this post you can see how easy it really is to DIY and remember that if you want to change your products over take your time! It is too overwhelming to try and do it all so as you run out of something, try to DIY and see what happens! You might be pleasantly surprised :)

Tuesday, September 14, 2010

What's Really In Our Plastics?


For all of you who really know me, know how anal I can be about things. One of those things has included what is really in our plastics. Years ago I remember reading an article about BPA and how bad it was for you. Then I read how reusing your plastic water bottles could leach the BPA into your system! Here I thought I was doing mama earth a favor by using less plastic bottles, but never thought I could be harming myself in the meantime! For many years now I have been using reusable bottles for water, cutting out plastic bottles all together. My fav are Sigg Reusable Bottles! They are super cute, and even carry little Siggs for the little ones! 

Since then, I have also cut out any plastic in the microwave and putting my hot food into plastic containers (I use my glass pyrex for food storage now). I had always felt like it was so confusing to figure out which plastics are bad and what I should and shouldn't do but another mama emailed this to me and I thought it was a perfect, easy to understand article about what's really in our plastics and how you can avoid the nasties if you choose to do so! Enjoy!


[Our homes are full of plastic, and the kitchen is no exception. The problem: Chemicals in plastic containers and other kitchenware may leach into the foods or drinks that they're holding. Scientific evidence suggests that some of these chemicals may be harmful to people, especially infants and children.

The two best-studied offenders are bisphenol A (BPA) and phthalates. BPA mimics estrogen and has been shown to disrupt hormone and reproductive system function in animals. Research by the National Toxicology Program found a moderate level of concern about its "effects on the brain, behavior and prostate gland in fetuses, infants and children." Phthalates have been shown to disrupt the endocrine system and have led to malformations in the male reproductive system in animals. Studies in humans have found associations between high phthalate exposure and a variety of 
health concerns including low sperm quality, high waist circumference and insulin resistance.

Researchers are still debating whether phthalates and BPA actually cause these health problems and, if so, how much exposure is necessary to trigger them. While these issues are being figured out, some experts recommend taking a preventive approach: "Minimize contact of 
food with problematic plastics as a precautionary measure to protect your health," suggests Rolf Halden, PhD, adjunct associate professor of environmental health sciences at the Johns Hopkins Bloomberg School of Public Health. Here are six simple tips for reducing your exposure to the potentially harmful chemicals in plastics


1. Know the code. Look on the bottom of your plastic to find the recycling symbol (a number between 1 and 7 enclosed in a triangle of arrows). The code indicates the type of plastic you are using and can give you important clues about safety. "We generally say 1, 2, 4 and 5 are considered to be the safest," says Sonya Lunder, senior analyst at the Environmental Working Group. Try to avoid using plastics with 3 or 6, as these leach chemicals that may be harmful. Number 7 is an "other" category that includes BPA-containing plastics called polycarbonates. These plastics, which you should avoid, will have the letters PC printed underneath the 7. 


2. Reconsider the microwave. Heat can increase the rate at which chemicals like BPA leach from plastic. Containers labeled "microwave safe" have been tested by the Food and Drug Administration (FDA) and found to leach extremely small amounts, which the FDA has determined to be safe. However, some experts advise people to keep plastic out of the microwave altogether. "I don't microwave anything in plastic," says Lunder. "It's really easy and fast to put my food into a ceramic or glass container and heat it that way." And never put plastic wrap on top of your food in the microwave, since it can melt. Use wax paper or a paper towel instead.

3. Use it for its intended purpose. Plastics that are designed for single use should only be used once. "Plastic breaks down over time," Lunder explains. "Some aren't designed to withstand heating and cooling." Most plastics with recycling code number 1 are intended for single use, such as disposable water bottles. And that takeout container from six months ago? Toss it. In general they're fine for refrigerating leftovers, but aren't designed for heat exposure or long-term use.


4. Wash by hand. Only put plastics into the dishwasher if they have a dishwasher safe label. If you want to be extra-cautious, wash all plastics by hand or use only glass and ceramic plates and dishes. In the dishwasher, plastics are exposed to detergents and heat, which may accelerate the leaching of BPA from food containers. 


5. Do not freeze. Only put plastics in the freezer if they have a freezer-safe label. Freezer temperatures can cause plastics to deteriorate, which increases the leaching of chemicals into the food when you take containers out of the freezer to thaw or reheat. (I use the OXO good grips, which are freezer safe and BPA free, for my berries and they work great!)


6. Don't panic. Cutting down on exposure to potentially harmful chemicals in plastics can benefit your health. But as Dr. Halden reminds us, "Many things in your life pose a much higher risk than exposure to plastics, such as smoking, poor diet and even driving a car." ]

Tuesday, September 7, 2010

Disinfectants: Is There An Alternative?

 We have been trying to buy cleaning products that aren't harsh for us or the environment. As I run out of my cleaning products I am going to try and make my own! I have been wanting to do this for a while, but I was always worried about them not really cleaning. I am finding more and more people make their own and they seem to be pretty happy with the outcome!


My first venture has been finding an all natural disinfectant. Don't you always feel better if you are cleaning with something that has a disinfectant in it?? Have you ever stopped to think what is really in it? So... I found some great alternatives:


  • I have been using essential oils for a while now. You can sub out things in your medicine cabinet, clean your house, etc. There are two oils that are specifically used for disinfecting: lemon and thieves
    • With both oils, you can place 10-15 drops in a bottle, add water and spray! Spray on counter tops, toys etc. and you have an all natural disinfectant! 
    • Place a few drops of lemon oil in your water and it will pull all the contaminants to the top and purify your water. Don't forget to use a straw to bypass the top!
    • Place a few drops of thieves in your palm and rub over skin and clothes. This will create a natural disinfectant protective barrier against outside germs!! 
Don't have essential oils on hand?! No worries! 
  • Quarter a lemon and place it in a bowl of water. Microwave on high for 2 minutes. Then take a rag, dip it in the steamy lemon water, and wipe down counters
  • Take quartered lemon and put each part into your sinks garbage disposal while it's on with the water running. This will serve double duty as it will freshen the air while cleansing the disposal line
I would love to hear your DIY cleaning recipes so I can try them for myself! Leave it as a comment on this post, on our face book page or email us

Tuesday, August 24, 2010

Healthy Living: Eggs Have Been Recalled!!!!

"A series of salmonella outbreaks across the country have prompted Iowa egg producer, Wright County Egg, to recall 380 million products. Eggs under the brands Lucerne, Albertson, Mountain Dairy, Ralph’s, Boomsma’s, Sunshine, Hillandale, Trafficanda, Farm Fresh, Shoreland, Lund, Dutch Farm, and Kemps should be returned to the store in which they were purchased for a refund. The recall is for shelf-eggs only, meaning that products containing eggs are not affected."


"FDA is collaborating with Federal and state partners to investigate a nationwide increase of Salmonella Enteritidis (SE) infections. Partners include the Centers for Disease Control and Prevention (CDC), the U.S. Department of Agriculture, and state public health and agriculture officials. Joint FDA/CDC field investigation teams are working to identify potential sources of SE infection in shell eggs". Click here for the full article


Click here to find out how to tell if your eggs have been recalled.


How can you be safe as a consumer while handling eggs?

  • Don’t eat recalled eggs or products containing recalled eggs. Recalled eggs might still be in grocery stores, restaurants, and consumers' homes. Consumers who have recalled eggs should discard them or return them to their retailer for a refund. Individuals who think they might have become ill from eating recalled eggs should consult their health care providers.
  • Keep shell eggs refrigerated at ≤45˚ F (≤7˚ C) at all times.    
  • Discard cracked or dirty eggs. 
  • Wash hands, cooking utensils, and food preparation surfaces with soap and water after contact with raw eggs.  
  • Eggs should be cooked until both the white and the yolk are firm and eaten promptly after cooking.
  • Do not keep eggs warm or at room temperature for more than 2 hours.   
  • Refrigerate unused or leftover egg- containing foods promptly.  
  • Avoid eating raw eggs.
  • Avoid restaurant dishes made with raw or undercooked, unpasteurized eggs. Restaurants should use pasteurized eggs in any recipe (such as Hollandaise sauce or Caesar salad dressing) that calls for raw eggs.
  • Consumption of raw or undercooked eggs should be avoided, especially by young children, elderly persons, and person with weakened immune systems or debilitating illness.


Kim and I have been talking a lot about how we have been on a quest to eat a more natural, whole foods diet. In the process of doing this, we have been buying more locally grown foods. Not only to know how they are growing the food, but also to support our local farmers and in turn, limiting our support for "big business" food manufacturing companies. I am sickened to see that 380 million products have been recalled and these are products that I may be feeding to my family. This reinforces to me why I don't want to support "big food" in this country and why supporting and purchasing from your local farmers is soooo important (or you can grow your own)! If this is something you feel passionately about, or just something you want more info on, I highly recommend watching Food Inc. This film is eye opening and will change your life... truly! If you are interested in finding places close to you where you can purchase local produce, meat and dairy please visit this link
If you are local to Cincinnati, here a few places we love where you can purchase food locally:

All in all, buying food locally is good for many reasons:

  1. You are supporting your local farmers and small businesses which helps the economy in your area
  2. You are helping the planet by saving the gas that it would normally take for items to be shipped to your local grocery store from other parts of the country 
  3. Naturally, you end up buying less processed and packaged food. This is good for your body because you know what ingredients is in your food and it is good for the environment because you are putting less waste into a landfill. If you have your own compost, you can even throw your leftover scraps into that instead of the garbage!
Are you convinced??!!! I know that we can't do it all, but this is one thing I am passionate about and although I am not the healthiest person 24-7 and I still purchase products from the grocery store, I am trying my hardest to make changes!!! One of my favorite sayings, "Small things done with great love will change the world"! I am trying to make changes in my life for the love I have for my family. Even if they are small changes I make each and every day (and Lord knows I am not perfect!), I hope that it will have a lasting effect on my family and ultimately the world! It may seem crazy, but I really do believe it! Everything we do individually adds up to a whole!!! 

I am going to get off my soap box now... thanks for listening! I would love to hear your favorite local places you visit and what changes you are making to change the world :)

**Don't forget to check out our Recipes page for healthy foods we love! We would love for you to share you recipes with us! Please email us at jennieandkim.recipes@blogger.com!


Tuesday, August 17, 2010

Make Your Own Baby Food!

The Cincinnati Family Enrichment Center had asked me to do a workshop on how to make your own baby food. I am certainly not a chef, but Sharon just wanted a mom point of view! She wanted me to share my own experience and tips and tricks I picked up along the way. Since I am so passionate about child nutrition, I was excited to be able to volunteer my time and hopefully help some other mamas!

I decided to attach my "cliff notes" below so I could share them with you (and have something to reference for when I have the next one!). Let me know if you have any questions!


·     ALWAYS consult with your Pediatrician before you start a DIY baby food program.
o    The 4 day wait rule: once you introduce a new food you should wait 4 days before introducing a new food

·     Resources:

·     Equipment:
o    Steamer, microwave, oven or a boiling pot of water depending on the food
o    Ice Cube Trays (you can save on foil if you buy the trays with lids)
o    Food Containers 
o    Blender/ Food Processor/ Magic Bullet
o    Ziploc bags

·     Baby Food Hygiene
o    Always wash your hands, your utensils, & your produce before doing any cooking!!!


DIY Baby Food (steps based off of Super Baby Food)

1.  Pick foods based off of your babies age (pgs. 86 & 87, see handout)
2.  Prepare (wash & then steam/ boil/ microwave) produce appropriate for you baby (pgs. 424-463)
3.  Puree produce
a.   The food consistency you are trying to achieve will be dependent upon you child and their age
b.  The more water you add, the thinner the consistency. You will add less water if you want the puree to be thicker
c.   You can create a smooth puree consistency the longer you blend the food. Once your child gets a little older, you can blend a little less to create a more chunky consistency.
d.  Pour your puree into your ice cube trays, freeze overnight, & then put your cubes into freezer safe Ziploc bags! Label your bags with the name of the fruit or veggie and the expiration date.
e.   Each cube is considered one serving

DIY Baby Cereal  (p 207)
(I have found that the magic bullet is AWESOME for grinding grains!!)

1.  Brown Rice: 
a.   Measure a cup of water on the stove to boil
b.  While the water is heating up, grind ¼ cup of brown rice until it is a powder
c.   Once your pot is boiling, turn the heat down to the lowest setting
d.  Sprinkle the powder into the pot while stirring briskly with your whisk
e.   Cover the pot and cook on low for 10 minutes
f.    This will make a little more than 1 cup. This will keep in the fridge for 2-3 days

2.  You can also do this with millet (3tbs), barley (1/4 cup), oatmeal (1/4 cup). Cook as directed above!

DIY Yogurt : click the link for step by step instructions

Tips & Tricks

1.  Take the food cubes you will need for the next day out the night before and they will be thawed by the time you are ready to use them!
2.  Need food now? Take your fresh fruit, peel, core and mash!
3.  Add tofu to anything to add some protein to the meal! You can freeze tofu in ice cube trays. Once you puree it, you pour it into the trays filling them half way, cover with water and freeze!
4.  Depending on age, see handout for Super Snacks.
5.  You can mix ANYTHING into yogurt:
a.   Veggie or fruit cubes
b.  Tofu cubes or fresh tofu
c.   Healthy Extras- use dependent on age appropriateness (see below)
d.  Hummus… you get the picture! ANYTHING!!!
6.  Healthy Extras: (these can be mixed into anything! For a complete list see p. 288)
a.   Brewer’s Yeast
b.  Wheat Germ
c.   Tofu
d.  Ground Nuts
e.   Nut Butters
f.    Ground Seeds
g.  Tahini & other Seed Butters
h.  Instant Non Fat Dry Milk
i.    Blackstrap Molasses

Toddler Ideas  
 ·     Although your child is on solids now, you can keep pureeing your fruits and veggies (now you have something to do with the produce that is about to go bad… puree and freeze). Mix them into yogurt, cottage cheese, or use as a spread on bread or crackers.
·     Continue mixing in your Healthy Extras!
·     If you have a picky toddler, try putting cheese, their favorite nut butter, or healthy salad dressing onto their vegetables.
·     Batch and Freeze: Pick out a few meals every month, make a large batch & freeze using the phantom freezer method (see batch and freeze for more info). You have healthy meals for the month!

Why Make Your Own?? (natural mother website)
1.  It's less expensive. A pound of fresh organic carrots will run you about $1. A four-ounce jar of organic baby food carrots cost about $.75--or $3 a pound!
2. It tastes better. Homemade baby food actually tastes like food, and your baby will grow accustomed to the flavor of fresh fruits and vegetables, possibly making her more likely to accept those foods later.
3. You know what's in it. You know for sure that it's free of additives and preservatives.
4. You can tailor the texture to your baby's preference and developmental stage.

**You can also check out our Recipes Blog for easy baby food purees and other nutritious meals for the little ones!**

Tuesday, August 10, 2010

Healthy Living: Healthy Rice Krispy Treats!

I was reading some of the latest info over at Healthy Alter Ego and came across this great healthy recipe for Rice Krispy Treats! If you haven't had a chance to check out their website - you are missing out! They have so much great information for health and wellness for the entire family!

Not all healthier versions of food taste great but we can't wait to try this one out on the boys because it looks delicious!

Healthy Rice Krispy Treats
6 cups brown rice crisps (or if you have the rice krispies, go ahead and use it)
2/3 cup almond butter (if you don’t have it, try peanut butter)
2/3 cup raw honey (again, you can use brown rice syrup or agave but you might not use as much)
1 tsp vanilla
1 tsp cinnamon
Melt the almond butter and raw honey in a sauce pan
Add vanilla and cinnamon
Combine with crispy rice

Press into 11 X 7 pan or dish lined with parchment paper (or lightly sprayed with oil)
They are that easy and delicious!

**Feel free to add chocolate chips, nuts, seeds or dried fruit to customize your bars. Of course the better quality your ingredients, the better they are for you. Just by making them yourself, you are aware of what’s in them.

For inspiration to make your treats healthier and to consider the trade offs, here are some of the facts around the nutrition:

  • Using brown rice crisps over the traditional white ones up the fiber, potassium and magnesium. This of course will vary depending on the brand you choose, so read your labels.
  • Almond butter adds quite a bit of protein (yeah) along with fiber, calcium, magnesium, phosphorus, potassium and iron.
  • Raw honey is loaded with antioxidants and is a powerful boost to the immune system.

Thanks goes to Phyllis McCarthy over at Healthy Alter Ego for this great recipe!!

What other healthy treats have you tried that your kids love? We would love for you to share them with us so we can add them to our recipe database!  Don't forget to check out our recipe blog for more great family friendly recipes! 

Thursday, August 5, 2010

Family Fun: Make Your Own Jam!

Our latest adventure this past week has been making jam, syrup and blackberry cobbler! Last Saturday we took a trip to Rouster's Apple House in Milford. They have pick your own blueberries and blackberries as well as peaches and apples! (They don't have this every day, so be sure to check out their website for their opening hours.) It was so much fun picking berries at the farm, and it's a great way to get the kids involved and use up some of their energy out in the great outdoors!


We wanted to get the berries so we could try making our own jam. We ended up with 10 jars of blueberry jam and 10 jars of blackberry jam. Since we are trying to be sugar conscience with our food for the boys, we used Sure Jell in the pink box that uses 25% less sugar.  With a regular box of Sure Jell you would normally have to use about 7 cups of sugar but we were able to cut back the sugar to only 4 cups. We hope by this time next year we will be able to use our stevia plant for an all natural sweetener, which is much healthier for you than the white refined sugar! We used a great website called Pick Your Own where you can find great information about canning ANYTHING! It gives you tips and tricks on the best ways to pick your own fruit, the easiest ways to can, and everything has step-by-step instructions with pictures! We have used this website for everything we've canned so far. 


Since we had SO much fruit, we were also able to make blueberry & blackberry syrup which is made similar to jam except you don't use the pectin (Sure Jell).  Please see here for more details. 


We also froze half of what we picked so we could have fresh berries through the winter. You could use them plain, in pancakes, muffins, smoothies etc.! The easiest way to we found to freeze the berries was to layer them in casserole dishes with foil in between, freeze overnight and then transfer them to freezer safe containers.


We had a few extra blackberries left over so we decided to make blackberry cobbler! Paired it with some ice cream and it was AWESOME!


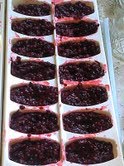
After we made the syrup, we had left over blueberry and blackberry "pulp" that we put in ice cube trays so we can use them later in yogurt, as a spread on toast, drink flavoring, etc. We try the no waste approach! We have come to realize you can freeze just about anything in ice cube trays!!!


If you like the idea of having fresh, healthy food on hand you might want to try canning for your family! We were pretty intimidated at first but the more we've been doing, the easier it gets! There are plenty of great resources out there to help you and we would love to share tips! Here's a few canning items that we use and love that could get you started!


Tuesday, August 3, 2010

Healthy Living: SUGAR Shocker!!!!

We recently wrote about how we have been researching juice for the boys and came across a graph that absolutely floored us!!! We know that sugar is in a lot of things we eat, but how much is really bad for you?? Are we overdosing on sugar without even knowing it???! Check out this graph with results from Harvard University. You will be amazed!!


If you want even more info, check out Jamie Oliver's video about how much sugar is really in the juice we drink. We have always been fans of his and he has inspired us to get involved in his food revolution, since child nutrition is a passion of ours!


If you are looking for a way to cut your sugar consumption, try these easy flavored water alternatives:

Add a few slices of fresh lemon or lime.
• Quarter an orange, squeeze in all of the juice, then toss in the squeezed quarters for color and extra flavor.
• Mash up a handful of strawberries or raspberries with a fork then add to the jug and stir through.
• Scrunch a handful of fresh mint in your hands to get the flavor going then add that to the jug with a squeeze of lemon or lime juice. If you’re feeling a bit adventurous, add a few slices of cucumber too. It might sound strange, but it is seriously refreshing. 


What are your favorite ways to cut sugar from your diet??

Tuesday, July 27, 2010

Healthy Living: Garden Update!

Since my last garden update things have been moving right along with all the veggies! It has been really exciting to see everything growing and I FINALLY have some red tomatoes ready to pick!

I just picked these from the garden today! We've had great success with the zucchini, tomatoes and we have big plans to make pickles with the cucumbers! One thing to note with the zucchini is there has been a bug going around and literally over night eating and killing the zucchini plants. It looks like a yellow lady bug - BEWARE! If you see them you need to get them off your plants ASAP to salvage them!


Another picture of the cucumbers - my only issue with these is how much these take over the garden! I have these in a garden bed with carrots, when you plant them just make sure as they're spreading they don't choke any other plants you have near by!


Green beans are looking great! We hope to can these as well!

Here's a picture of the potatoes - these have been super easy to grow, it's still a bit early to harvest them so the rest will stay in the ground for a while longer to get a bit bigger.


We want to hear about your garden adventures and what you've enjoyed most so far this year! Also, we want to hear about your favorite recipes for all your veggies! Send them here!
 
Are you looking for a FREE way to get innovative with healthy eating and cooking up all the yummy veggies of the season? Check out the details below for a FREE class at Whole Foods in Mason!


Wednesday, July 28th 
Healthy Eating Cooking Class
6:00 p.m.
Cost: FREE
Join Brittany our Healthy Eating Specialist for delicious and easy dinner with recipes from the books that are the core of our Health Starts Here program Invite your friends and family to join you for this fun and delicious event! All attendees will receive delicious bites, recipes, and some healthy eating and cooking tips.

Registration
All classes are free unless otherwise noted but registration is required. To sign up for a class, contact Paula Mangold at 513-459-6131 or
paula.mangold@wholefoods.com

Whole Foods Market Mason
5805 Deerfield Blvd.
Mason, OH 45040